Showing posts with label craft time. Show all posts

Tuesday, March 12, 2019

Are you having trouble threading the needle?

You start to notice, it's harder to be hand sewing darker colours, especially at night, the fine print is harder to see, and your eyes feel strained. Holding your work further away sort of assists but, threading the needle... It's hard enough to find time to sew without having to worry about being able to thread a needle.

Most of us will need reading glasses at some point, for the majority this will usually happen in our forties. As you move through the forties, fifties & sixties the natural lens of your eye thickens and becomes less elastic and slowly loses its ability to accommodate from far to near - and back again - this is known as presbyopia.

Many people will just pick up a pair of glasses from a chemist, service station or junk store and for a few these cheater glasses will work. But, if you have astigmatism, you will find it more precise and less tiring on your eyes to have lenses fitted with the correct prescription. When we have stigmatism our eyes are shaped more like a football, the cheater glasses are made with the assumption our eye is perfectly round.
Presbyopia, Do your eyes feel tired and strained?
Book an appointment with your local optometrist. Before the test, take notice of how you use your eyes:
  • Where do you hold your sewing projects (up close or in your lap)?
  • What is the approximate distance of the sewing machine from your eyes?
  • Do you mostly sew during the day or at night?
  • What sort of visual tasks do you do at your day job?
These tasks, which we perform daily, have different visual lengths - near, intermediate and distance. The optometrist can tailor your prescription and eyewear selection to your individual visual needs. If you do a lot of hand-work or sewing at night, consider having a pair of glasses made specifically for that task.

Even if you don't currently need glasses or contact lenses a routine eye test is recommended. The optometrist will not only look at the vision needs of your eyes, but they also look at the health of your eye and keep a watch for cataracts, glaucoma, diabetic retinopathy and other eye diseases.

In addition to eyewear also consider task lighting. The purpose of task lighting is to not only increase illuminance but also have good contrast. General lighting can be reduced when task lighting provides focused light where needed.
quote, outline stitching
Different approaches for task lighting:
  • Localised task lighting, where the lamp supplies both ambient light and task light
  • Freely adjustable task light such as a gooseneck, balanced-arm lamp, or swing-arm light
  • Magnifying task light, where the task light comes with a built-in magnifying glass
  • Asymmetric task light, where the lamp is placed at the side of the work area
Task lighting can also be built into machinery, where a specific work area needs illumination. Many of the new sewing machines now have multiple LED lights across the body of the machine. Even if you don't currently wear glasses having good lighting while you work helps to reduce eye strain.

Related Posts:

What to consider when buying a new sewing machine?

Wednesday, November 19, 2014

sewing time - making potholders


The inspiration for this collection of potholders started with a flower, a Marimekko Flower. The flower was on a white background with a bit of careful cutting & stabilising it now sits on a patched black n white background. With top finished, it was time to sandwich the top with a layer of Insul-Bright, a layer of cotton wadding and a piece of cotton fabric as the back layer.

The layers are held together with several rows of stitch; it was then time to cut my stitched piece into a circle shape. Tracing around a bread n butter plate is an excellent way to get a uniform shape. The edges are finished with a red & white striped bias. Using fabrics from the stash, I sewed a few more, making a collection of useful/decorative potholders. 

Related post:
Make a Simple Sketchers Go Bag
Are you having trouble threading the needle?
Framed purse and floral beauty fabric

Sunday, June 29, 2014

cut, paste & easy foam stamps

Like so many of us, I enjoy magazines. I enjoy the first read, then re-read and then eventually giving them away, keeping them or ripping them up and re-purposing the content into a collage, notebook covers etc. I used a handful of these collected pages into a couple of cards I made earlier this week. As well as the re-purposed pages, I also incorporated stamped patterns. 

The stamps were made using "Foamstastic" a self-adhesive craft foam that is easily cut with scissors. It can also be cut with an e-xacto knife for more delicate work. The craft foam is very easy to work with. Once the shapes are cut, peel the paper off at the back and stick shapes onto a piece of cardboard (I used scraps of matting board). Once you have your stamp assembled, use an ink pad to apply colour to your stamp and stamp away. Remember to re-apply ink between each stamping.

Related Posts:
A carry bag using off-cuts and fabric inspired by nature
5 Simple Ways to Enjoy Simple Pleasures
Food for thought

Join the journey and never miss a post, subscribe to the newsletter.


Wednesday, May 14, 2014

in between...

In between working on a couple of background changes to my blog which I'll launch later this month, renovating our kitchen and most importantly completing my pieces for the open studio (only 10 nights of sleep) I've been enjoying timeout moments with a little bit of knitting making dishcloths. Using knitting needles inherited from my Gran and 100% cotton knitting yarn, I now have a growing collection of dishcloths - they work a treat in the new kitchen. I've also been re-reading "The Golden Hands" collection. A series of books released in the seventies full of projects and helpful hints for needlecraft, knitters & dressmakers. I do enjoy re-reading these books, while fashion and colours may change technique is constant - an enjoyable timeout and many fond memories.


Give me a museum and I'll fill it

Monday, January 20, 2014

making plant tags

Our garden it's an eclectic mix of plants, weeds, edibles, chickens, green tree frog, blue tongue lizard, geckos, insects and various items re-purposed to be garden features. A melting pot of inspirations and enjoyable moments. Recently I've been turning a small section into what I'm calling 'The Salad Bowl' a bed filled with a variety of herbs, lettuces, tomatoes, spinach, beans & rocket. A small area that we can wonder out to and pick a salad as needed. I often let a couple of the lettuces, rocket, basil & flat leaf parsley go to seed so fresh crops can pop through and I weed out the older plants. So I can keep track of what's what I've been labeling and having a wonderful time making these painted sticks to hold the labels.
The materials: sticks, an assortment of beads, sharpie pen, correction fluid pen, leftover house paint, wire and fabric & netting scraps (I used a few of the pieces leftover over from the disintegrate/integrate project). The how began with painting the sticks. Once dry I used the correction fluid pen to draw patterns on two of the sticks. I've wrapped the others sticks with the fabrics, beads and wire. I've attached the labels with either a piece of wire or cutting a slot in the top of the stick.

Tuesday, December 24, 2013

it's a wrap

desserts are made, milk and cookies are out for Santa and I've almost finished the wrapping
firstly made the wrapping paper by re-purposing several magazine pages 
 stitching butchers paper then decorating with nylon rope & a piece of ribbon
 stitch was used in place of glue and also used as decoration
Merry Christmas

Wednesday, August 14, 2013

pencil tin challenge

   one discarded pencil tin was cut, drilled and trimmed
a collection of signatures prepared
these were joined together using Coptic Stitch
to make a little note book

We Broadstroke girls had another little challenge - create something with the discarded pencil tin. We each had a tin and we each created something quite different. I was particularly drawn to the colors of the pencil image and used this as my inspiration when gathering together materials and ideas. 

On Saturday 31st August 2013 a collection of our challenges and works will be on display as part of 
the Inner City Circles biennial show - Quilt & Textile Temptations at
Milton State School, Bayswater Street, Milton 10am-3pm

Monday, July 15, 2013

creative playtime & card making

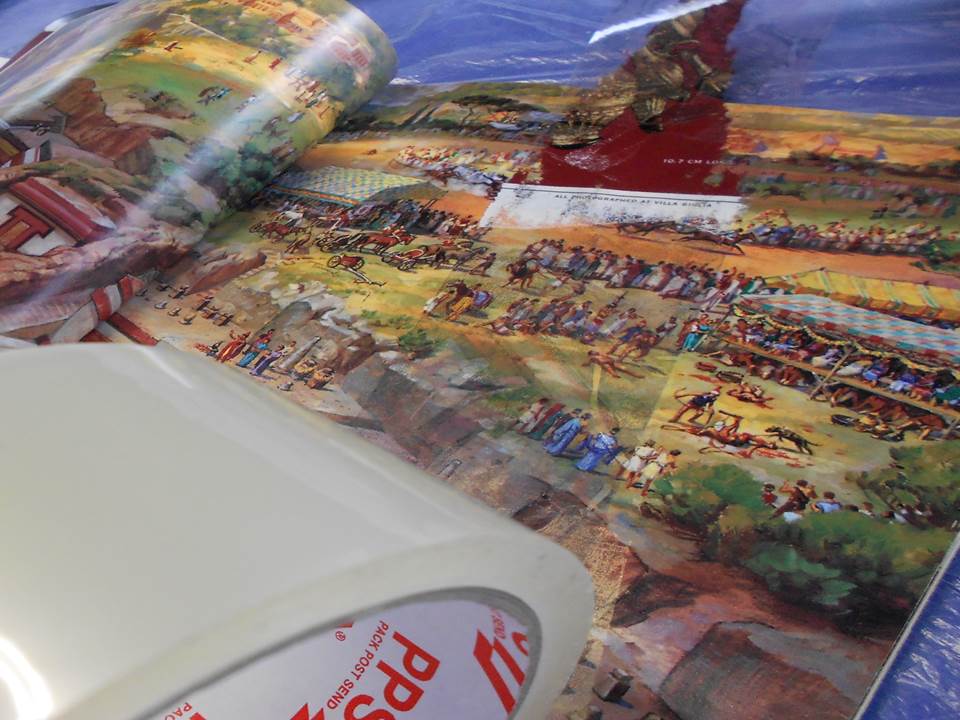
 A few of our family and friends Birthdays are celebrated throughout the month of July, so I've been enjoying some card making. Packing tape, old / discarded magazines, scissors, glue stick, a spoon and card stock (card used 190gsm)
is what I've used to create these cards
 spread the tape over the magazine page, use the back of the spoon to burnish the tape down and rip away
 If it all works perfectly you lift the top layer of the paper away and end up with strips similar to the above
Cut these strips into lengths the same size as the card front your using. Mix n match the pieces until you have a combination you like. Use the glue stick to adhere the pieces in place. I also put a layer of packing tape over the top and folded the excess tape to the back which helped to seal everything including the edges. Before adding the final layer of tape you could also finger rub metallic paint over the lumps and bumps that often occurs when working with packing tape.

I've used this packing tape technique to create the decorative covers on the
Ginger & Mandarin Marmalade

Thursday, November 15, 2012

decorating little books


I spotted these little notebooks in our local stationary store the other week and grabbed one pack of each color. Each book has 60 lined pages with a sewn binding. Since purchasing them I've been having a wonderful time making up collage pieces to attach to the front of each little book.

Wednesday, November 14, 2012

re-purposed doily + potholder

I have acquired a few doilies over the years some as gifts, a couple thrift ed etc. A few of them are ripped or stained in sections and I had worn out my potholder. So I decided to re-purpose one of the doilies, combine it with a couple scraps of check fabric and make a new potholder. 
Using block 'Double Square' from the book Around the Block by Judy Hopkins as my inspiration
added a small border to the block
layered and quilted everything with a couple layers of wool wadding in the center and finally
added a binding which incorporated a loop

Thursday, October 18, 2012

Brisbane Craft & Quilt Fair

Went along to the Craft and Quilt Show today. It's on for the remainder of this week 17th - 21st October 2012 at the Brisbane Convention Centre. Had a wonderful day shopping, viewing the displays, watching demonstrations and catching up with friends including my lovely friend Pauline from Funky Friends Factory (Pauline and I first met each other when we were both working for an optical retail company and discovered we both harbored a driving passion for creativity)
Today was also my turn to be on the 2QAQ (Queensland Quilters Art Quilts) demonstration table. There were four of use there throughout the day and each of us sharing one of our favorite techniques and/or inspirations. I had samples of the image transfers that I enjoy doing so much. I had samples for three of the methods I use to transfer image - the glue transfer method, inkjet printed using bubble jet set & ink jet printed using ink aid. The glue transfer method is the most transportable so I also had a couple of works in progress. Had a lovely day chatting with people, hearing and sharing the inspirations and learnings of each others creative journeys.

Monday, October 15, 2012

finished - enjoyed making a pencil case

Like so many of us - I often end up with small pieces of fabrics, papers etc and what to do with these. I also had been wanting to make up a bag/case to pop a few of my pens and small sketchbook into. I tend to keep my ink jet printed pieces together in a folder, so I started with these and laid several pieces onto a piece of steam a seam then fused this to a piece of fabric and finally ironed
a piece of 'iron on vinyl' over the top. I now had a front and back piece. Cut two pieces for lining, cut the zip to size and sewed the case together.

Saturday, June 23, 2012

a little bit of craft time decorating notebooks

Recently enjoyed a little bit of craft time. Decorated the fronts of a couple of notebooks using bits of fabric, braid, laces and ribbon from my stash. And then of course, enjoyed photographing them. 
Related Posts Plugin for WordPress, Blogger...

Join the Journey

Subscribe to Newsletter

* indicates required
/ ( mm / dd )